 A quick tour
The most common tasks performed in SEAN are recording a training session, reviewing a training session as a whole, reviewing a training session stroke-by-stroke and organising training results. These tasks are described below, step-by-step.
Back to top
 Record a training session : Row window
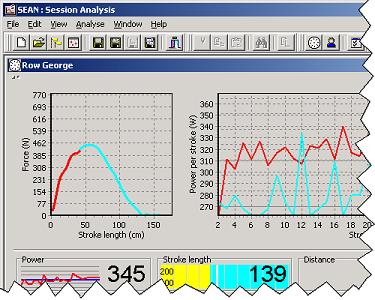 To record a training session, follow these steps. Make sure the RP3 USB interface, Rowperfect PC interface or MkIV monitor is properly set-up and connected to the PC. Alternatively, use the build-in demo data (see step 7).
- Start SEAN and click on the Row button (
 ) on the tool-bar (or press (Ctrl) + (R), or select Row from the View menu).
 - A dialogue New row window appears, asking for information about the rower. Here either enter the data needed, or open a previously saved User file.
- When done, click OK, and the Row window is displayed.
- This window contains by default two charts (left: Force curve of current stroke; right: Stroke history of all strokes) and 8 parameter cells at the bottom. All these items (charts and cells) can be adjusted by right-clicking on them.
- Also by default, a training session is set to 2km countdown. To modify this, click the Training button (
 ) on the tool-bar (or press (Ctrl) + (T), or select Training from the View menu). When the workout has been modified, click the Row button (
 ) on the tool-bar (or select Row from the View menu, or press (Ctrl) + (R)) again to switch back to the Row window.
 - In the lower left-hand corner, click Connect (or press (Space)) to make a connection to the interface.
- The Connect dialogue appears, asking for details about the interface. Select the appropriate COM-port or choose "Demo" and click OK.
- Start rowing or watch the demo.
- To cancel or to interrupt a training session, click on the Disconnect button (or press (Space)).
- When done, switch to the Training window by clicking on the Training button (
 ) on the tool-bar (or press (Ctrl) + (T), or select Training from the View menu).
 - The Training window appears, showing results and giving the opportunity to add some extra information to this training session on the General tab. When done, click the Save button (
 ) on the tool-bar (or press (Ctrl) + (S), or select Save from the File menu), to save the training session to disk.
Back to top
 Review a training session : Stroke data window
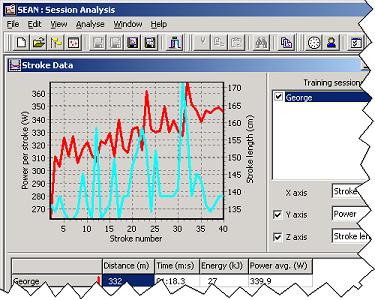 A training session can be reviewed by following these steps:
- Start SEAN and open a file by clicking the Open button (
 ) on the tool-bar (or press (Ctrl) + (O), or select Open... from the File menu).
 - Click on the Stroke data button (
 ) on the tool-bar, or select Stroke data from the Analyse menu, to open the Stroke data window.
 - Set X (bottom), Y (left) and Z (right) axes as needed, by selecting the appropriate parameter on the right-hand side of the window.
- To compare this training session with another, just open one or more other files.
- Zoom in on the chart, by selecting a rectangle. To do so, click on the chart with the left mouse button, drag the mouse to the bottom and right, and let go of the mouse button.
- Move the chart, by right-clicking it and moving the mouse. When done, let go of the mouse button.
- Reset a chart by selecting a rectangle from bottom-right to top-left.
Back to top
 Review a training session stroke-by-stroke : Force curves window
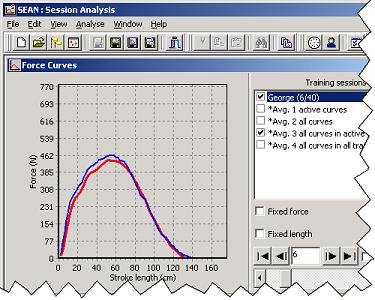 To analyse force curves, take these steps:
- Start SEAN and open a file by clicking the Open button (
 ) on the tool-bar (or press (Ctrl) + (O), or select Open... from the File menu).
 - Click on the Force curves button (
 ) on the tool-bar, or select Force curves from the Analyse menu, to open the Force curves window.
 - Click the training session in the list on the right, and use the "VCR" buttons (
 ) to view the next or previous stroke. The Play button shows the force curves as an animation. The data-area at the bottom of the screen is updated for every stroke.
 - To compare this training session with another, just open another file.
- Scale the force curves by force (vertical) or length (horizontal), for better comparison.
Back to top
 Organise training results : Browse window
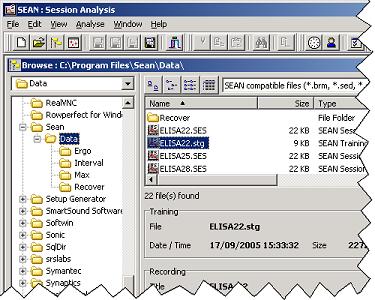 Training results are saved in files. These can be organised through the Windows Explorer, but this can be done far more easily with SEAN by using the Browse and Calendar windows:
- Start SEAN and open the Browse window by clicking on the Browse button (
 ) on the tool-bar, or press (Ctrl) + (B). Alternatively, choose Browse from the File menu.
 - Here, navigate through the drives and folders of your PC as in the Windows Explorer: Double click to open a folder or file, sort data by clicking on the column titles, right-click for a pop-up menu and so on. By default, only SEAN compatible files are listed.
- Click on the black arrow button (
 ) to show the file info panel. When a file is selected, information such as date, time and title are listed here.
 - When screen size allows (at least 1024 x 768 is needed), a preview chart can be switched on next to the file info panel, to give some more insight in the contents of the selected file, without having to open it.
Back to top
 Organise training results : Calendar window
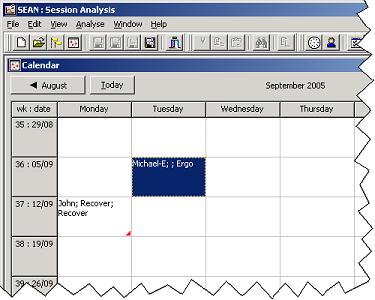 The Calendar window represents training session files in a - what's in the name - calendar view.
- Start SEAN and open the Calendar window by clicking on the Calendar button (
 ) on the tool-bar or choose Calendar from the File menu.
 - SEAN will scan all files in the folder the program is installed in and below, and present a calendar like view showing all training sessions over a six weeks period.
- Navigate through time by clicking the buttons with the names of the previous and next month on them.
- Open a training session for a specific day, by double clicking that date. If more than one file is present for a date, a list will be shown from which to choose.
- To start a new training session for a specific date, right-click the date and choose the New training session option in the pop-up menu.
Back to top
 Try it yourself
There is a lot more to tell about SEAN, but the best way to learn is to experiment with it. Get the latest version on the Download page.
Back to top
